前言
前两天跟导师交阶段学习汇报的时候说自己在摸索一套工作流,然后在总结的时候我又想看看别人做了什么吧.然后!我看到了 notero 那个插件……新世界的大门向我打开.然后又折腾了一下发现了一个很流畅的文献下载、管理、阅读、整理、导出工作流.
以下我将总结如何将 zotero,margin note3,notion 无缝缝合的文献阅读工作流,支持一键导出为 PDF 或 beamer.
需要准备的软件
Zotero:非常棒的文献管理软件,在全平台都可以轻松下载.最开始使用 Zotero 是因为茉莉花那个插件可以抓取知网论文的元数据.但也就装了这一个插件而且现在正经人谁用知网啊,一直当传统的文献管理软件,对抓取论文和插入引用的支持很好.但在这里更重要的是他的强大插件.
Margin note3:非常棒的 PDF reader,但又不止于 reader.Margin note3 不仅拥有非常灵活的批注工具(对 apple pencil 的支持不错),而且拥有非常有效的 iCloud 同步,强大的笔记、思维导图制作、管理和复习工具.这个软件的学习曲线比较陡(但只是作为 reader 的话没问题),但最大的问题是获取:只发布在 MacOS/iOS 平台,而且这两个的订阅还是独立的!要分开付费.所以我只订阅了 iOS 端,MacOS 端只当作 reader,幸好 margin note 的笔记同步还算能用.
当然 Margin note3 并不是必要的,这只是我习惯的 PDF reader,只需要是有云同步功能的 PDF reader 甚至是 Zotero 自带的 reader 都是不错的选择.
Notion:all-in-one 个人工作站,很难用语言描述有多强大.在该工作流中扮演数据库和笔记归档的角色.同样有非常强大的拓展.
能够编译 python 和 markdown 的软件.如 VScode.
Latex Workshop.本文提供直接将文献导出为 Beamer 的代码,非必需.
需要准备的 Zotero 插件
Notero:连接 Zotero 和 Notion,重中之重.
ZotFile:用于管理附件实现归档自动化和全平台同步.
Zotero Better Notes:用于书写 beamer,非必需.
接下来让我们开始.
对软件和插件进行配置
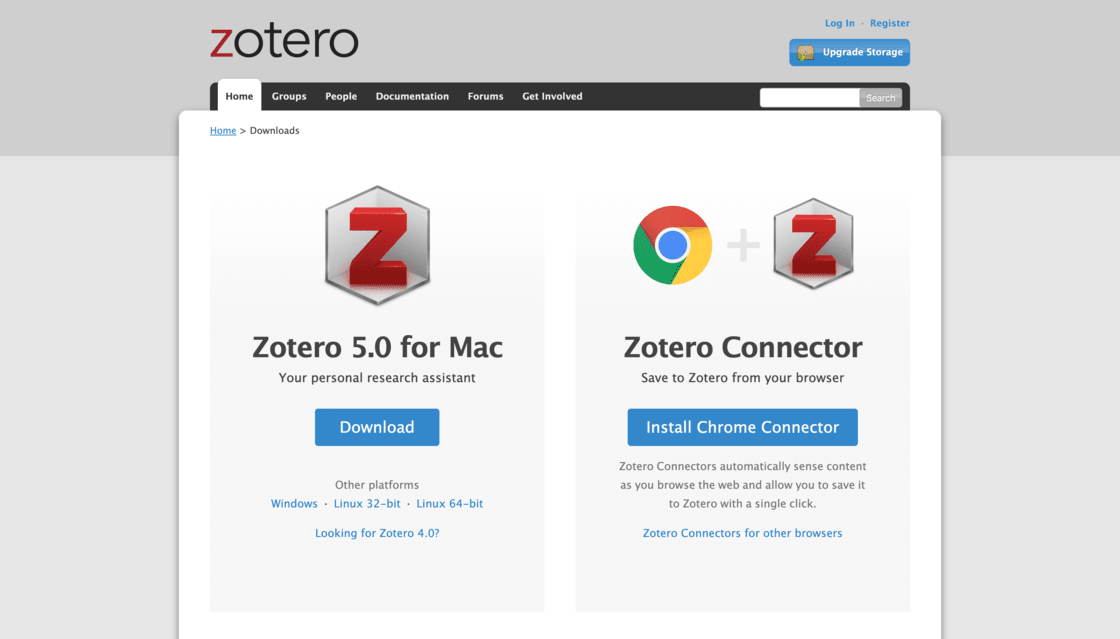
安装 Zotero 并设置同步
下载安装 Zotero,然后登录 Zotero注册页面 注册一个自己的 Zotero 帐号.之后系统会根据你的用户名直接生成个性域名.接着打开 Zotero 找到工具->首选项(Windows)或 Zotero->Preferences(Mac),在同步(Sync)一栏输入前面注册的帐号和密码,这样文献库就可以自动同步到 Zotero 官网了然后下载 Zotero 对应的浏览器插件.
浏览器插件的作用: 当你在浏览器上打开一个页面后,在地址栏末尾会看到一个小图标(可能是文章或者书本,取决于打开的页面的内容,软件可以自动识别),点击这个图标,关于文献的相关信息就会自动添加到 Zotero 的数据库中,如果可以获得 pdf 文件,也会将其一起下载并作为附件保存下来。对于非文献如网页等资料也会对网页信息生成快照留存.
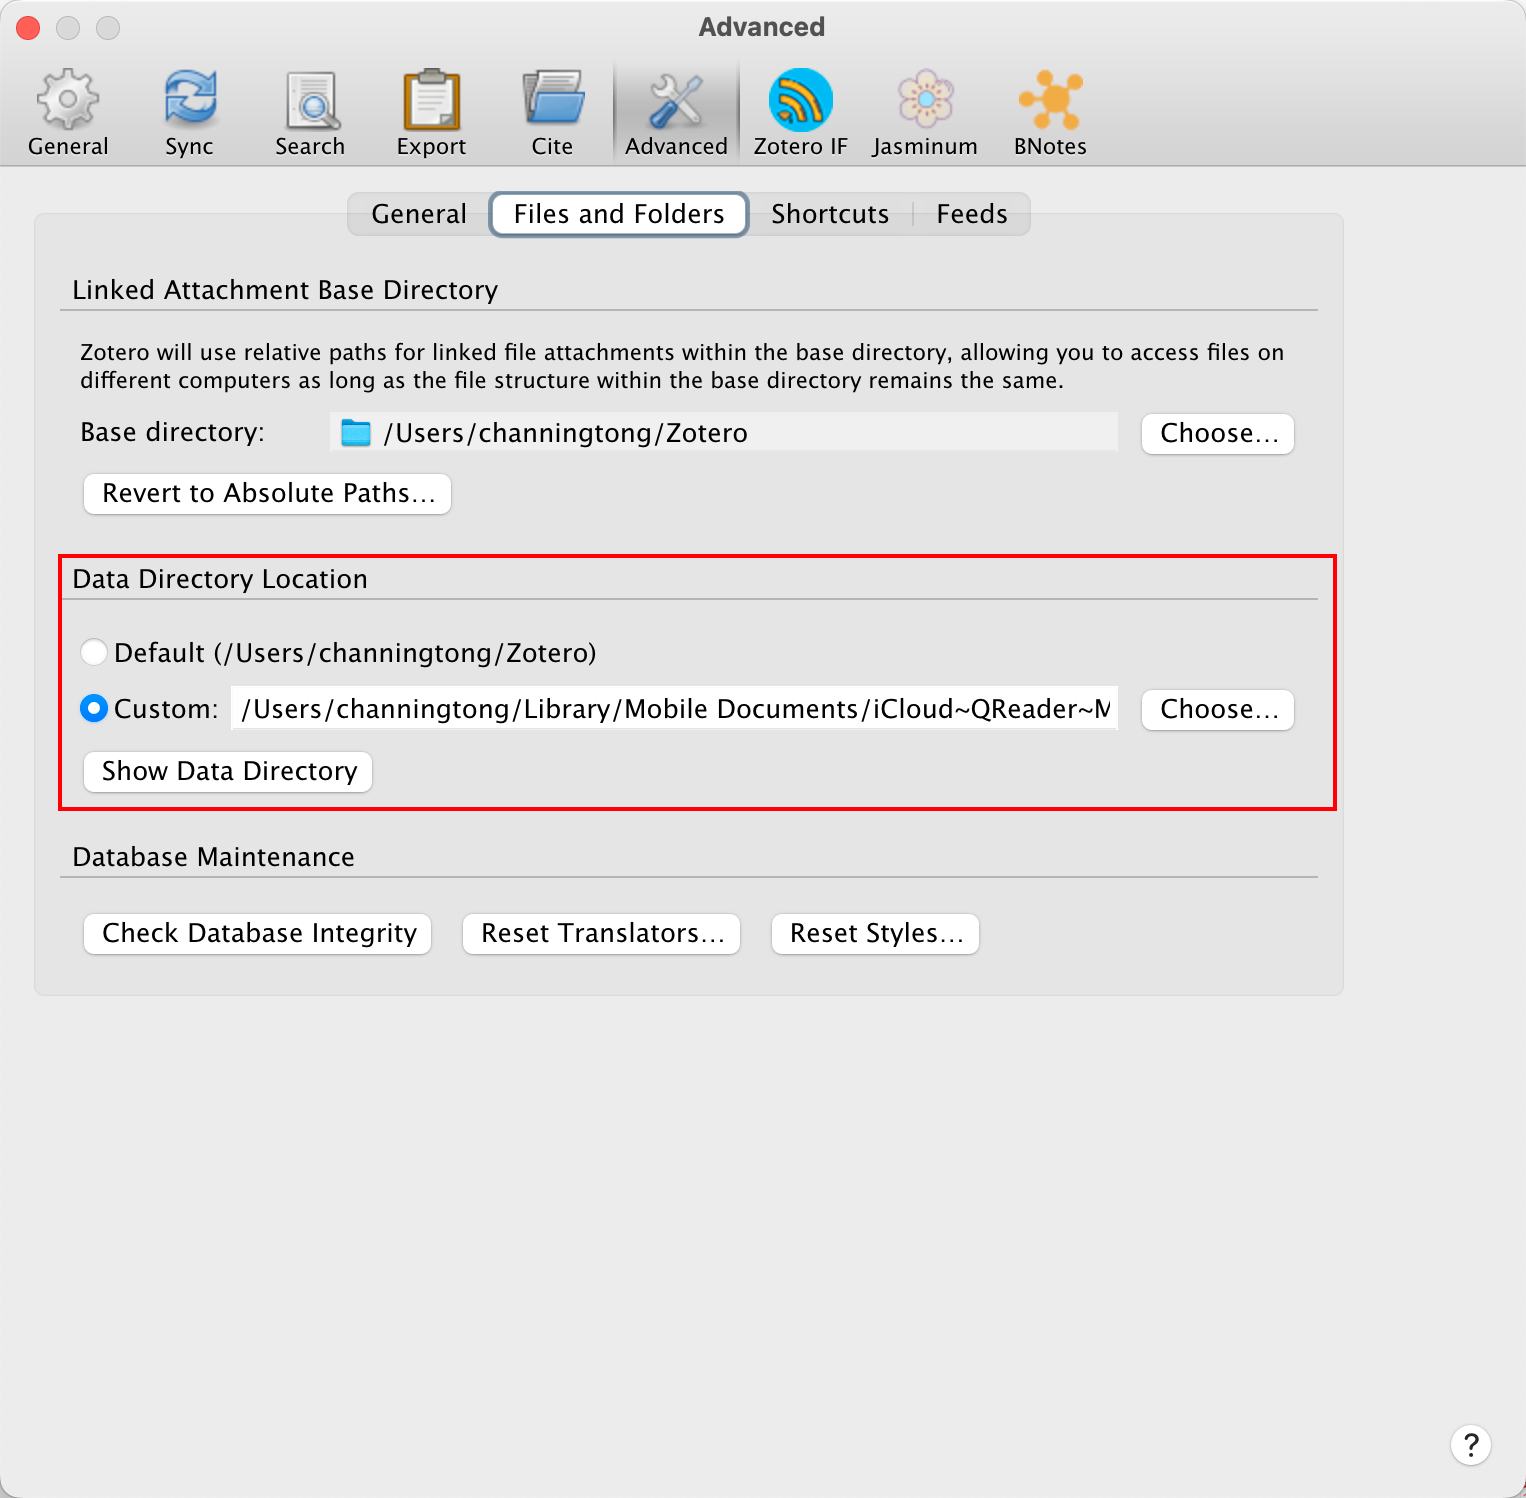
Zotero 的同步规则为条目免费同步,附件(文献 PDF 本身)提供 300M 免费存储之后需要付费( 好贵).所以我们关闭 Zotero 的自动附件同步使用网盘同步.如 OneDrive,iCloud,坚果云(支持 WebDev).网络上有不少使用坚果云的 webDev 服务进行同步的教程.我此处使用的是 iCloud 同步.
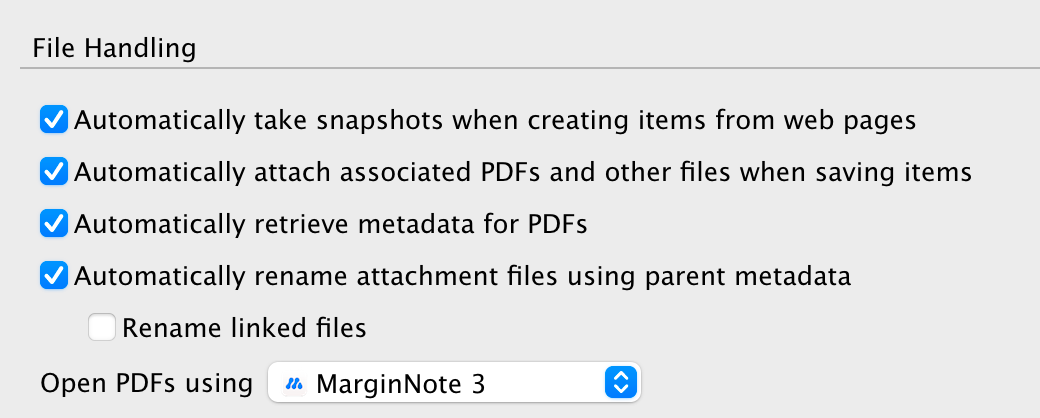
在 Zotero 的首选项设置的 Advanced 选项卡中将 Data Directory Location 定位到 Margin Note3(或自己使用的 reader)在 iCloud 上的云同步文件夹,然后在 General 选项卡将 Zotero 的默认 PDF 打开方式设置成 Margin note3(或者自己使用的 reader),这样在 Zotero 中打开文献时就会自动跳转到 reader 并使用云服务器自动同步 .
最后在 Microsoft Store 上下载 iCloud 云盘应用,就可以直接查看在 iCloud 上同步的文件,再支持 Windows 平台的 PDF reader 就可以在全平台上阅读和批注文献!
iCloud - Free download and install on Windows | Microsoft Store
With the iCloud for Windows app, you can access photos, files, passwords, and other important information from your iPhone or other Apple devices on your Windows PC.
iCloud Photos • Access and view your iCloud photos directly in the Microsoft Photos app. • Keep your photos up to date across all your devices and your PC. • Create Shared Albums and invite others to add photos, videos, and comments.
iCloud Drive • Access your files and folders from iCloud Drive directly in File Explorer. • Share files and sync updates back to iCloud Drive automatically.
iCloud Passwords • Easily login to websites with the user names and strong passwords that you’ve saved to iCloud Keychain. • Access your passwords and save new ones in the iCloud Passwords app. • When you’re logging in to websites, the iCloud Passwords extension in Chrome or Edge autofills passwords and saves new ones. • Generate verification codes to help you sign in to websites.
iCloud Contacts, Calendars, and Bookmarks • View your iCloud calendars and contacts with classic Outlook. • Sync and merge your bookmarks from Safari with the iCloud Bookmarks extension in Chrome, Edge or Firefox.
https://apps.microsoft.com/detail/9PKTQ5699M62?rtc=1&hl=en-hk&gl=HK
安装 ZotFile
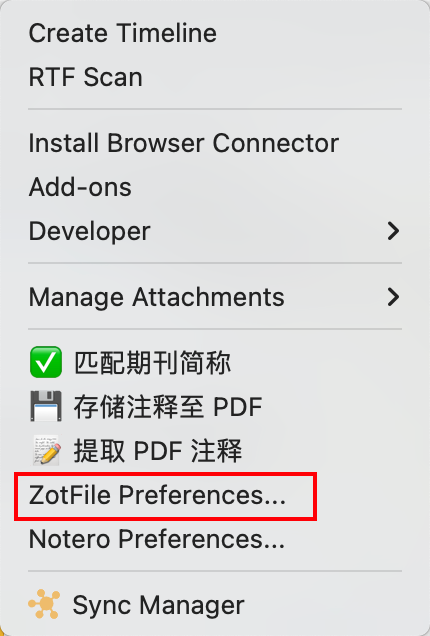
由于我们用的不是 zotero 的官方同步方式,因此需要一个插件辅助我们进行管理.进入 ZotFile 的 GitHub 主页可以下载插件.xpi 文件然后在 zotero 中安装(看相关教程).ZotFile 可以将从浏览器中下载的 pdf 文件自动重命名(如 author_year_title.pdf)并放入我们建立好的云盘目录内,并将对应的附件链接添加到文献条目中.
接下来我们还需要对 Zotfile 进行一些设置.安装完插件后在工具选项卡可以看到 ZotFile Preferences 这个选项.将 Source Folder for Attaching new Files 中的目录设置为浏览器默认的下载文件目录,之后将 Location of Files 中的目录设置为我们在云盘中建立的 zotero 附件同步目录.保存设置即可.
完成以上操作后,当我们在浏览器中点击网址旁边的文章图标时,软件就会自动将下载下来的 pdf 文件拷贝到云盘的目录中,并将它的目录链接保存到对应的文献条目下。
安装 Sci-Hub Plugin for Zotero 和 Zotero Reference
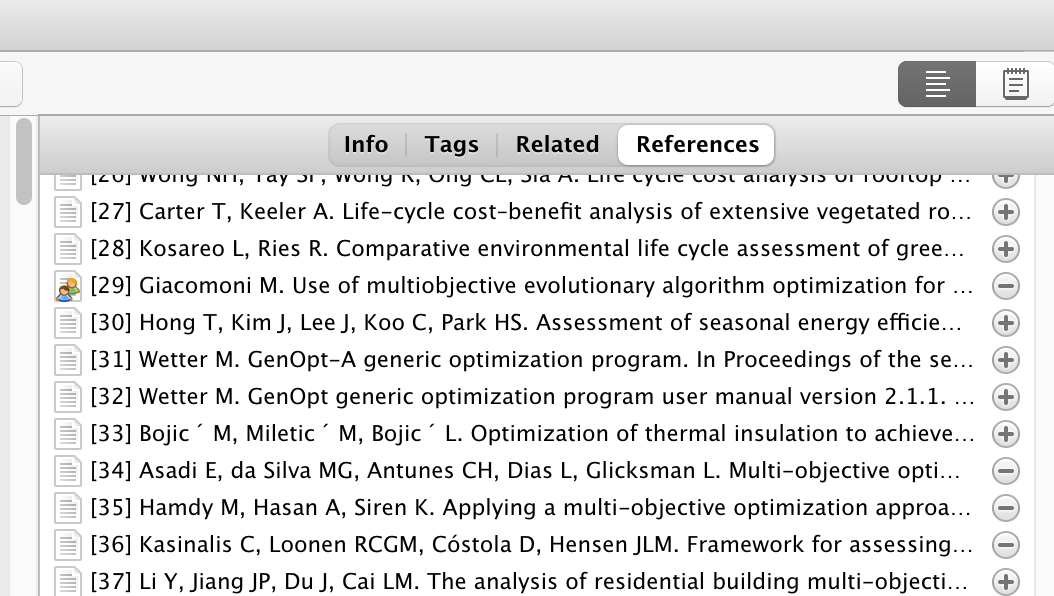
为了提高文件获取的效率,我们希望能在 Zotero 中就能从参考文献列表中下载文献. Zotero Reference 是一个自动提取 PDF 中的参考文献并提供一键获取文献条目的插件. 只需点击加号即可抓取条目.
在side-bar中可以非常快捷地查看
但是, 由于许多文献并非开放获取,所以这样的方法并不能保证抓取到 PDF.那么我们使用 Sci-Hub 插件解决这个问题.只要有条目添加到 Zotero 中 Sci-Hub 插件就会自动尝试抓取 PDF 到本地,配合 ZotFile 就实现了文献获取的全自动化啦!
安装 Notion 和 Notero
Notero 这个插件对这个工作流的影响是相当决定性的(在看到 Notero 之前我都是手动录入条目的),极大解放了生产力.Notero 是一个将 Zotero 中的文献条目自动同步到 Notion 中的插件,可以在进入 notero 的 GitHub 主页下载,配置方法详见下文这个博客(包会):
使用 Notion 管理文献阅读
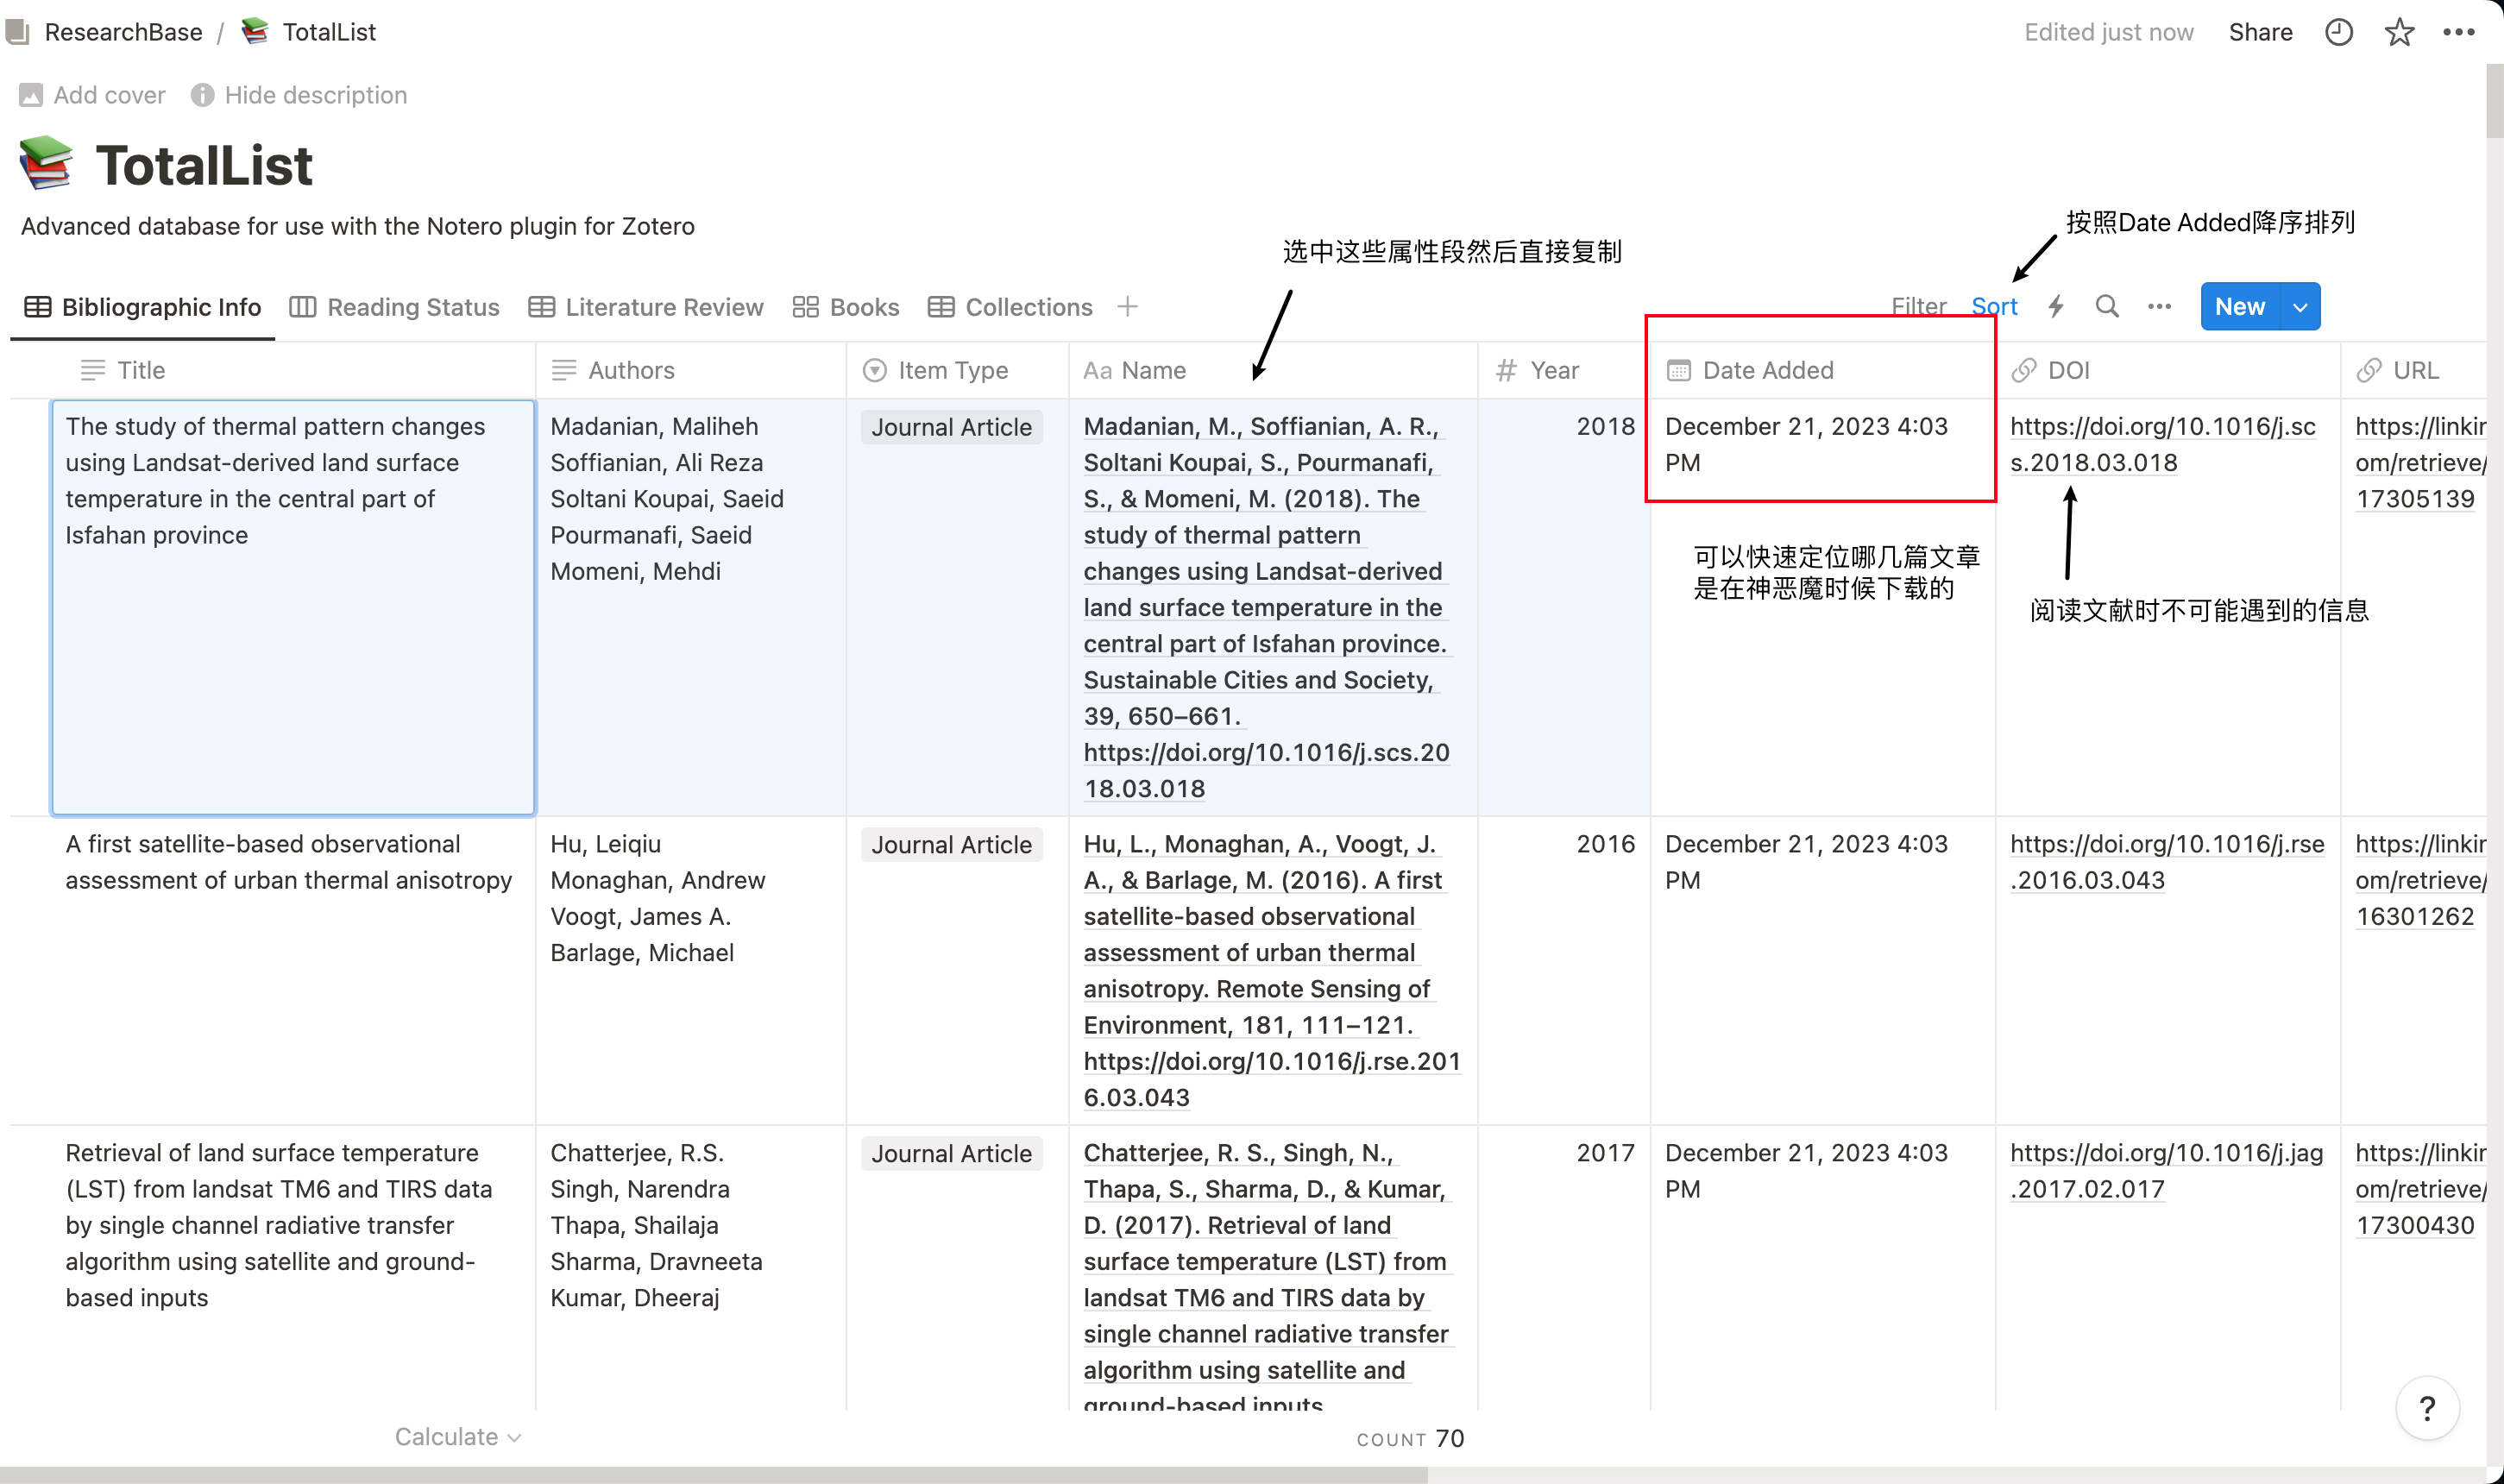
在完成上一步工作之后在使用 zotero 在网站中抓取文献后已经可以将文件内容直接显示在 Notion 中了.但是这个数据库并不是完全我想要的,因为抓下来 ≠ 我会去读 ≠ 我想读,所以我还希望能有另外一个表手动添加计划阅读的文献.不过在上述完成之后就已经很方便了,只需要对官方模板属性段顺序简单调整然后选中必要的文献信息然后拷贝到新的数据库中就可以.我的设置为Untitled ,在右上角点击 Duplicate 就可以一键复制到自己的账户中.
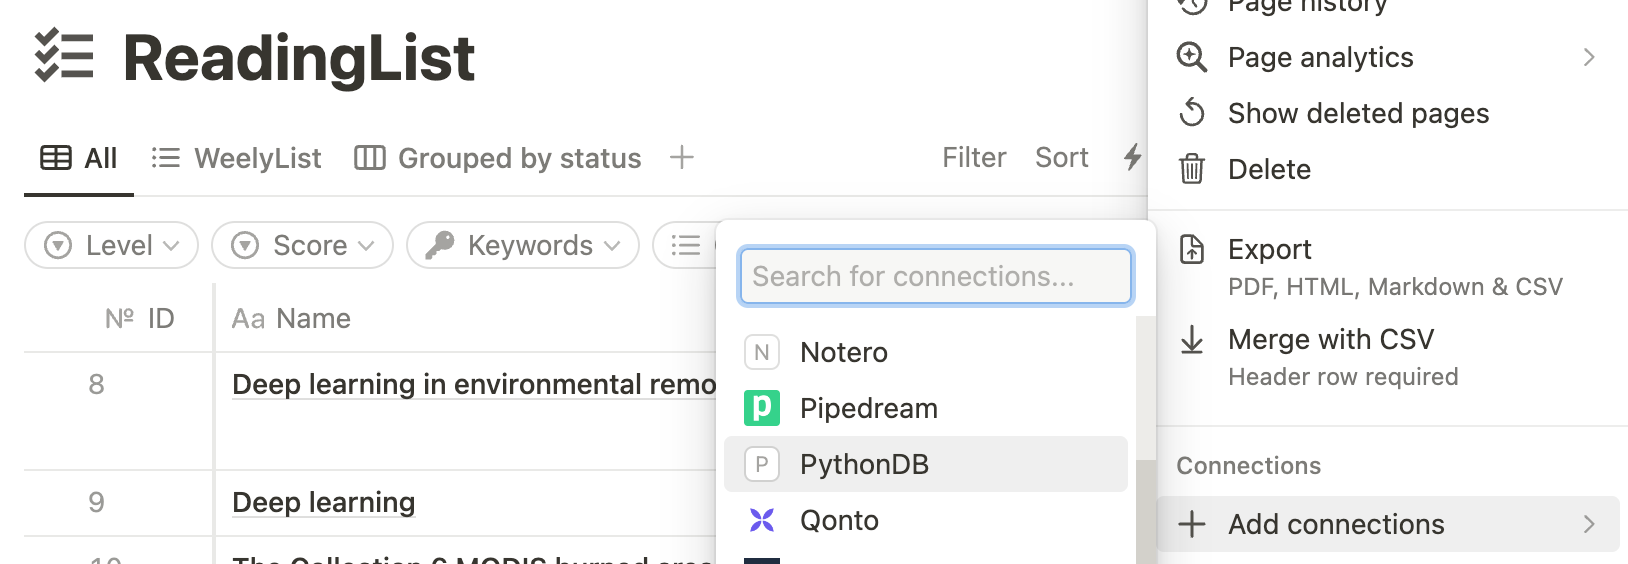
如果不想再创建一个数据库,只需要将 python 的 connnection 创建到和 notero 同一个数据库即可.
如右图所示,这些是我阅读文献时会关注的内容,以及建立这些字段我认为有助于帮助后续检索与回顾.Related 字段使用 notion 提供的双向链接,比如将参考.框选的五个字段就是从自动同步的文献库中直接粘贴的基本信息.
使用 Python 访问 Notion API
接下来使用 Python 抓取 Notion 中的数据进行快速导出.首先新建一个 integration(如我叫 PythonDB)然后同上进行连接.
接着打开 Python 配置 notion_client 库用于抓取 Notion API.
这篇博客写的很详细,参考这篇博客即可.其中 pprint 可能不需要重复安装.
我希望能快速导出一段时间内阅读的文献,因此对上述抓取进行以下修改
1
2
3
4
5
6
7
8
9
10
11
12
13
14
15
16
17
18
19
20
21
22
23
24
25
26
27
28
29
30
impiort os from notion_client import Client from pprint import pprintnotion = Client(auth="<notion token>" ) db_name = "<database name>" db_id = "<database ID>" page_id = "<page ID>" startDate='YYYY-MM-DD' endDate='YYYY-MM-DD' db_values = notion.databases.query( **{ "database_id" : db_id, "filter" : { "and" : [ { "property" : "Completed" , "date" : { "after" : startDate }}, { "property" : "Completed" , "date" : { "before" : endDate } } ] } } ).get("results" )
在每次使用的时候修改当中’after’和’before’的参数就可以一键将一个时间中阅读完成的文献抓取到本地了.
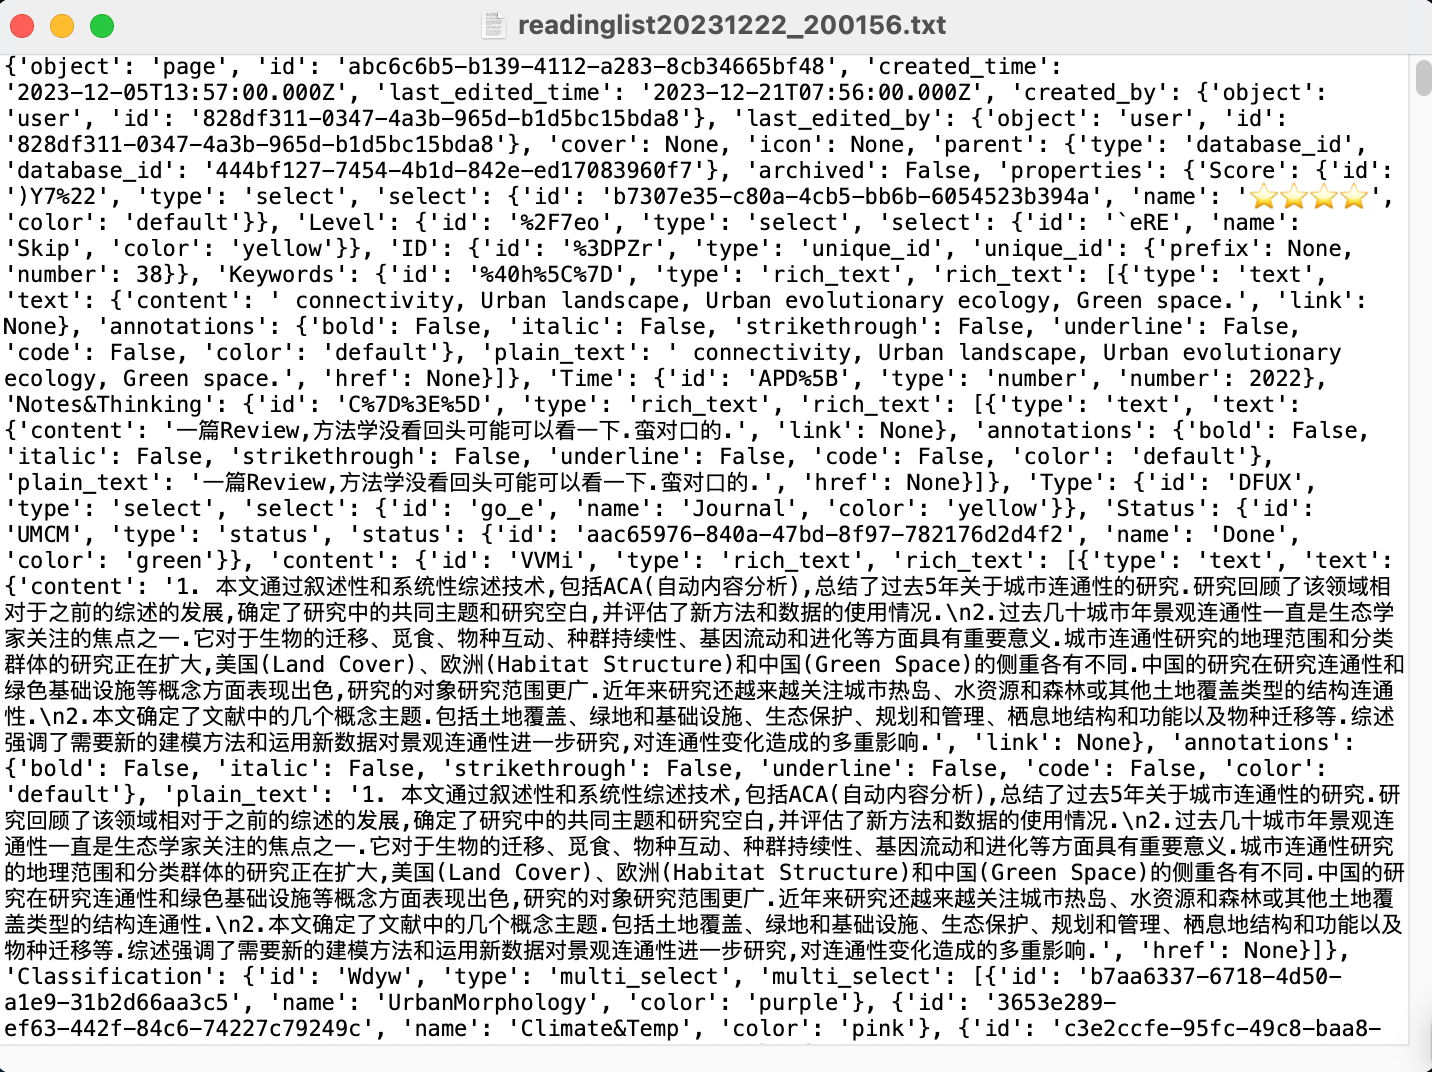
但是直接打印 API 调用结果的输出如右图所示,内容太多没办法整理.同时我们希望输出的结果能直接使用.因此再使用 Python 提取当中相关内容并将其输出为 Latex 语法.
如图看不了.
首先整理抓取到的数据(如果自己创建的数据库字段名不同则需要做相应修改):
1
2
3
4
5
6
7
8
9
10
11
12
13
14
15
16
17
title=[] author=[] completeDate=[] keywords=[] content=[] notes=[] publication=[] level=[] for item in db_values: title.append(item["properties" ]["Name" ]["title" ][0 ]["plain_text" ]) author.append(item["properties" ]["Author" ]["rich_text" ][0 ]["plain_text" ]) completeDate.append(item["properties" ]["Completed" ]["date" ]["start" ]) keywords.append(item["properties" ]["Keywords" ]["rich_text" ][0 ]["plain_text" ]) content.append(item["properties" ]["Content" ]["rich_text" ][0 ]["plain_text" ]) notes.append(item["properties" ]["Notes&Thinking" ]["rich_text" ][0 ]["plain_text" ]) publication.append(item["properties" ]["Publication" ]["rich_text" ][0 ]["plain_text" ]) level.append(item["properties" ]["Level" ]["select" ]["name" ])
然后生成输出文件,使用当前日期创建文件可以避免重复(反正只是一个中间文件):
1 2 3 4 5 printFormat=input ("请输入打印格式:(doc/slide)" ) import timecurrent_time=time.strftime("%Y%m%d_%H%M" , time.localtime()) while printFormat not in ["doc" ,"slide" ]: printFormat=input ("请输入打印格式:(doc/slide)" )
这里我提供了两种模板,只要将文中代码拼接在一起并配置参数就可以运行了!
文档(doc)格式用于学习进度汇报等简单的输出形式,使用 markdown 语法:
1 2 3 4 5 6 7 8 9 10 11 12 13 14 15 16 17 18 19 20 21 22 23 24 if printFormat=="doc" : file_name = "readinglist" +current_time+".md" with open (file_name,"w" ,encoding= 'utf-8' ) as file: file.write(f'**Time**: {startDate} ~{endDate} \n' ) file.write('## 文献阅读\n' ) for i in range (len (title)): str_author = author[i].replace("\n" ,", " ) file.write(f"### {title[i]} \n" ) file.write(f"**作者**: {str_author} \n" ) file.write(f"**期刊**: {publication[i]} \n" ) file.write(f"**关键词**: {keywords[i]} \n" ) file.write(f"**完成时间**: {completeDate[i]} " ) if level[i]=="Peruse" : file.write("(精读)\n" ) elif level[i]=="Skim" : file.write("(略读)\n" ) elif level[i]=="Skip" : file.write("(选读)\n" ) file.write("#### 内容简介\n" ) file.write(f"{content[i]} \n" ) file.write("#### 笔记与思考\n" ) file.write(f"{notes[i]} \n" ) file.write("\n" )
输出结果如下(markdown 源码和编译后结果):
1
2
3
4
5
6
7
8
9
10
11
12
13
14
15
16
17
18
### Quantifying 3D building form effects on urban land surface temperature and modeling seasonal correlation patterns **作者** : Huifang Li, Yanan Li, Tao Wang, Zhihua Wang, Meiling Gao, Huanfeng Shen**关键词** : 3D UrbanMorphology, LST, RF, Seasonal correlation**完成时间** : 2023-12-21(精读)#### 内容简介 1. 本文指出城市的垂直结构对城市热环境有很大影响,过去的研究大多数忽略了建筑物的垂直结构.然而由于城市形态由多个具有不同密度和高度的建筑物组成,“城市峡谷”(其中一条街道两侧都有建筑物形成了峡谷状环境)无处不在.这些建筑结构可以改变热储存、减少天空视野或改变气流,从而影响城市温度.本文使用 Random Forest 方法,确定最佳研究尺度,进一步量化了三维建筑形态对城市地表温度 LST 的影响并探究了各个建筑指标对 LST 影响的季节相关性.2. 结果表明以 180m 为尺度建立的模型精度最好(对武汉中心市区而言).建筑密度 BD、建筑高度 BH 和建筑阴影 BS 是季节稳定的因素,建筑天空可视因子 SVF 和建筑前向面积指数 FAI 随季节变化明显.特别的 BS 是一个随时间变化的量但是对季节性变化稳定.BD 在四个季节中与 LST 呈显著正相关,BH 呈显著负相关;SVF 在春秋冬季对 LST 有降温,而在夏季呈复杂的相关性;FAI 在春夏秋季具有降温效果而在冬季具有增温效果.3. 本文对城市形态的空间分布也进行了一些研究,例如发现位于河湖边的城市的 SVF 影响显著较大(湖陆风也许),有图但是没有进行进一步解释.#### 笔记与思考 1. Urban canyon 这个概念有意思之前没想到过,以及文中提到高层建筑可能会产生湍流从而影响局部气候等,这个视角在城建越来越密越来越高的城市化进程中很有价值.2. 文中使用 2018 年的 Landsat 数据,但是每个季节只取了一景 emmm 会有影响吗?3. 本文首先确定了遥感影像处理的最佳分辨率,并指出不同的尺度对各个指标的刻画会有影响.那么这个影响在多大程度上可以忽略?在研究景观的尺度效应和阈值效应的时候不能忽视这个问题.以及选取的指标时想一下这个指标是否具有明显的时间变化?4. 本文的研究路径以方法迁移为主,方法论很规整每一步都值得学习.
编译后结果
演示文档(slide)格式用于组会汇报或阶段性学习汇报等较详细的输出形式,使用 Latex 的 beamer 进行制作,采用清华 beamer 模板改装.如果熟悉 beamer 语法的话很容易将生成结果嵌入.代码如下:
1 2 3 4 5 6 7 8 9 10 11 12 13 14 15 16 17 18 19 20 21 22 23 24 25 26 27 28 29 30 31 32 33 34 35 36 37 38 39 40 41 42 43 44 45 46 47 48 49 50 51 52 53 54 55 56 57 58 59 60 61 62 63 64 65 66 67 68 69 if printFormat=="slide" : header=r''' \newcommand{\folder}{/Users/channingtong/Document/Latex/Beamer} \input{\folder/include.tex} \usepackage{\foloder/CUG} \usepackage{soul} \begin{document} \input{\folder/titlepage.tex} ''' file_name = "readinglist" +current_time+".tex" with open (file_name,"w" , encoding= 'utf-8' ) as file: file.write(header) for i in range (len (title)): file.write(r"\section{文献" +str (i+1 )+r"}" +"\n" ) file.write(r"\begin{frame}{文献" +str (i+1 )+r"}" +"\n" ) file.write(f"{title[i]} " +"\n\n" ); file.write(r"\small\textbf{作者}: " +f"{author[i]} \n\n" ) file.write(r"\small\textbf{期刊}: " +f"{publication[i]} \n\n" ) file.write(r"\textbf{关键词}: " +f"{keywords[i]} \n\n" ) file.write(r"\textbf{完成时间}:" +f"{completeDate[i]} " ) if level[i]=="Peruse" : file.write("(精读)\n\n" ) elif level[i]=="Skim" : file.write("(略读)\n\n" ) elif level[i]=="Skip" : file.write("(选读)\n\n" ) file.write(r"\scriptsize\textbf{内容简介}:" ) content_str=str (content[i])\ .replace(r"&" ,r"$\&$" )\ .replace(r"_" ,r"\_" ) file.write(f"{content_str} \n\n" ) file.write(r"\end{frame}" +"\n" ) file.write(r"\begin{frame}{文献" +str (i+1 )+r"}" +"\n" ) file.write(r''' \begin{minipage}[c]{0.5\linewidth} %\medskip %\hspace{2cm} 这里插入文字 \end{minipage} \hspace{1em} \begin{minipage}{0.4\linewidth} \medskip %\hspace{2cm} \begin{figure}[h] \flushright \includegraphics[width=\textwidth]{pic/CUG_Logo.png} \caption{这里插入图片} \end{figure} \end{minipage} ''' ) file.write(r"\end{frame}" +"\n" ) file.write(r"\begin{frame}{文献" +str (i+1 )+r"}" +"\n" ) file.write(r"\textbf{笔记与思考}:\scriptsize" +"\n\n" ) file.write(r"\begin{itemize}" +"\n" ) notes[i]=notes[i].split("\n" ) for j in range (len (notes[i])): note_str=str (notes[i][j]).replace(r"&" ,r"$\&$" ) file.write(r"\item " +f"{note_str} " +"\n" ) file.write(r"\end{itemize}" +"\n\n" ) file.write(r"\end{frame}" +"\n\n" ) file.write(r"\end{document}" )
这段代码会对每一个文档生成 3 页 slide,中间笔记页可以按照需求自行添加.效果演示如下:
接下来我还希望能把对应的 PDF 找到方便查阅分享和复习,所以我又写了一段脚本:
1 2 3 4 5 6 7 8 9 10 11 12 13 14 15 16 17 18 19 20 21 22 23 24 25 26 27 28 29 30 31 32 import timeimport subprocesscurrent_time=time.strftime("%Y%m%d_%H%M" , time.localtime()) file_name = "filelist" +current_time+".txt" dict_name=f'{current_time} _PDFs' os.system(f'/bin/mkdir {os.getcwd()} /{dict_name} ' ) command_header='''/usr/bin/find '/Users/channingtong/Library/Mobile Documents/iCloud~QReader~MarginStudy/Documents' -iname ''' ; with open (file_name,"w" ) as file: title=[] author=[] date=[] filename=[] filedict=[] for item in db_values: title.append(item["properties" ]["Name" ]["title" ][0 ]["plain_text" ]) author.append(item["properties" ]["Author" ]["rich_text" ][0 ]["plain_text" ]) date.append(item["properties" ]["Time" ]["number" ]) first_author=author[-1 ].split(',' )[0 ] first_author=first_author.split(' ' )[-1 ] filename.append('\"' +f'{first_author} *- {date[-1 ]} - {title[-1 ][:30 ]} ' +'*\"' ) cmd_fatch=command_header+filename[-1 ] os_fatch=subprocess.check_output(cmd_fatch,shell=True ) if (os_fatch==b'' ): print (f'未找到{filename[-1 ]} ' ) else : filedict.append(os_fatch.decode("utf-8" ).strip('\n' )) file.write(filedict[-1 ]+'\n' +author[-1 ]+'\n' ) os.system(f'/bin/cp \'{filedict[-1 ]} \' {os.getcwd()} /{dict_name} ' )
由于 margin note 中笔记和文档是分开管理的,所以这样抓取的 PDF 是不带笔记的,那怎么抓取带笔记的 PDF 文件呢?由于 margin note 的规则限制不能批量导出带笔记的 PDF 文件但是只需要将上文中生成的文件夹导入到 marginnote 中就可以直接查看了.
值得一提的是,这样会使得 margin note 中的文件组织目录比较混乱,所以在删除文件时要谨慎.
这样一站式文献工作流就搭建完成了!
参考资料
参考博客和进一步设置请见: